A700 and A700x LED indicators
Talkman devices, wireless headsets, and their chargers have LEDs that indicate the state of the equipment. These LEDs may be on, off or blink. In some cases an LED blinks, alternating between two colors.
The A700/A700x devices have several LED indicators to inform you of different states. The indicators and their blinking patterns are described in the following sections:
Device State Indicator
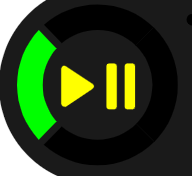
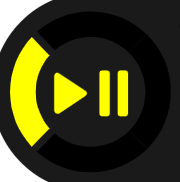
The device state indicator is a ring that is divided into a large and small segment:
| Color | Blink Pattern | Device State | |
|---|---|---|---|
| Off | Off |

|
Off |
| Green | Small segment pulse |

|
Sleep |
| Green | Small segment on |

|
On |
| Green | Solid ring |

|
Charging complete |
| Green | Fast blink |

|
Touch Config or TouchConnect successful |
| Yellow | Rotating ring |

|
Loading or changing operator |
| Loading or changing task | |||
| Loading or changing voice | |||
| Starting up | |||
| Yellow | Solid ring |

|
Charging |
| Yellow | Small segment pulse |

|
The device is running in Platform only mode |
| Yellow | Small segment on |

|
TouchConfig sender mode entered |
| Yellow | Large segment on |

|
TouchConfig receiver mode entered |
| Red | Rotating ring |

|
Firmware load |
| Shutting down | |||
| Red | Ring on |

|
Early boot |
| Red | Fast blink |

|
Charging fault or in charger or connected to power supply without
battery TouchConfig or TouchConnect not successful |
Battery Charging Indicator
| Color | Blink Pattern | Battery State | |
|---|---|---|---|
| Off | Off |

|
Not seated in charger or charger not on |
| Yellow | On |

|
Charging |
| Green | On |

|
Charging complete |
| Red | Fast blink |

|
Charging fault |
Battery Health Indicator
| Indicator Blink Pattern | Indicator Color | Battery Charging State | Notes | |
|---|---|---|---|---|
| Off |
|
Off | The battery in the device has no battery health issues. In other words, the battery is healthy. | |
| On |

|
Red | The battery in the device has a health issue. | A user can use a fully charged battery with a health issue. However, the supervisor should refer to VoiceConsole to get more information regarding the battery health issue, which might mean replacing the battery. Refer to the VoiceConsole online help for more information on the battery health statistics. |
Replace a battery only with another battery that has been authorized by Honeywell for the product you are using. Use of an unqualified battery may present a risk of fire, explosion, leakage, or other hazard. See also Honeywell Battery Safety
Near Field Communication (NFC) Indicator
| Blink Pattern | NFC State | |
|---|---|---|
| Off |

|
NFC radio is disabled. |
| Fast blink |

|
The device is scanning for a tag. |
| Blink |

|
TouchConfig sender or receiver mode entered |
| On (for one second then off) |

|
The device successfully read a tag. |
| Slow pulse |

|
Readable - act as a tag |
Bluetooth Indicator
| Blink Pattern | Bluetooth State | |
|---|---|---|
| Off |

|
Bluetooth radio is disabled. |
| On |

|
Device is searching for other Bluetooth devices. |
| Fast blink |

|
Device is attempting to connect to another Bluetooth device. |
| Pulse |

|
Bluetooth is connected to a peripheral. |
| Discoverable Blink Pattern |

|
Device Bluetooth is discoverable by other devices. |
| Slow Pulse |

|
Bluetooth is on and enabled, but is not connected, not in discovery or paging mode, and not discoverable. |
Network Indicator
| Network Indicator | Network State | What is Happening | When This Occurs | |
|---|---|---|---|---|
| Off |

|
Radio enabled but unconfigured | The radio is powered on but the device is not attempting to connect to the network. | No network is defined for the device. |
| Fast Blink |

|
Radio enabled and connecting to network | The radio is powered on and is scanning, associating, and authenticating. | On first connection, on re-association and after every roaming out of network. |
| Pulse |

|
Connected to network | Full network connection. | The device may be requesting and receiving an IP address. |
If the LEDs indicate that there is a problem, refer to information on troubleshooting to solve the problem. See also Troubleshooting Problems Indicated by LED.
