Connecting Cables to the Power Supply and Attaching the Power Supply to a Vehicle
The following parts are supplied by Honeywell for attaching the 12 or 24 volt vehicle's power supply to a device:
| Item # | Quantity | Description |
|---|---|---|
| 1 | 1 | Power Supply, 9-36 VDC Input |
| 2 | 1 | Cable from power supply to battery adapter |
The following parts are supplied by Honeywell for attaching the 36 or 48 volt vehicle's power supply to a device:
| Item # | Quantity | Description |
|---|---|---|
| 1 | 1 | Power Supply, 18-60 VDC Input |
| 2 | 1 | Cable from power supply to battery adapter |
You need the following equipment:
- One Cable from the power supply to vehicle’s power source. Honeywell recommends an industrial rated cable with the following specifications: Number of conductors = 3, Gauge of wire = 16, Temperature = -40C to 90C
- Cable ties
General Guidelines for Routing Electrical Cables
- The vehicle must be off and the vehicle's battery must be disconnected.
- Cables should be kept clear of surfaces that may become hot.
- Cables should not be run such that they can get caught on moving parts.
- Cables should not be run on the outside of a vehicle.
- Cables should not have 90 degree turns, the minimum bend radius should not be less than one inch
- To remove slack on a cable it should be coiled up and secured inside the vehicle with a cable tie.
- For maximum safety fuses should be located as close as possible to the power source.
- To protect the A500 VMT from power surges and to perform voltage conversion a converter module is fitted between the A500 VMT and the forklift battery.
- Disconnect the vehicle battery.
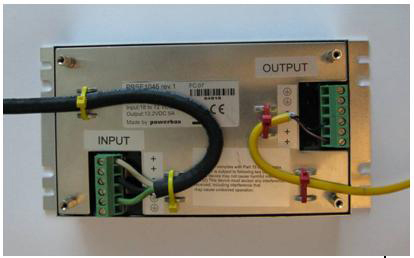
- Remove the four screws from the top of the power supply to expose the screw terminals.
- On the cable from power supply to the vehicle’s power source, strip the three cables to expose approximately 5mm of copper. Ensure the cable is long enough to reach from the power supply to the vehicle’s power source.
- On the yellow cable from the battery adapter to the power supply, strip the black and brown cable to expose approximately 5mm of copper. The Blue cable is not required; it can be trimmed where it exits the yellow cable. Ensure the cable is long enough to reach from the power supply to the vehicle’s power source.
- Connect the cables from the battery adapter to the power supply by performing the steps below.
- Loosen the screws to where the connection is to be made on the power supply.
- Match the cables to the correct locations as indicated in the chart below:
Cable Output Connector Brown – Battery Adapter Positive + Black – Battery Adapter Negative - No connection needed GND Blue (cut back) Not applicable - Tighten the screws.
- Ensure the cables are secure
- Connect the cables from the vehicle’s power source to the power supply by performing the steps below:
- Loosen the screws to where the connection is to be made on the power supply.
- Match the cables to the correct locations as indicated in the chart below:
Cable Input Connector White (may differ depending on the cable) – Vehicle Positive + Black (may differ depending on the cable) – Vehicle Negative - Green - Vehicle Ground: Follow equipment manufacturer’s recommendations for connecting the case ground terminal of the power supply.
GND - Tighten the screws.
- Ensure the cables are secure
- Once all of the cables have been successfully installed, attach cable ties to secure the cables.

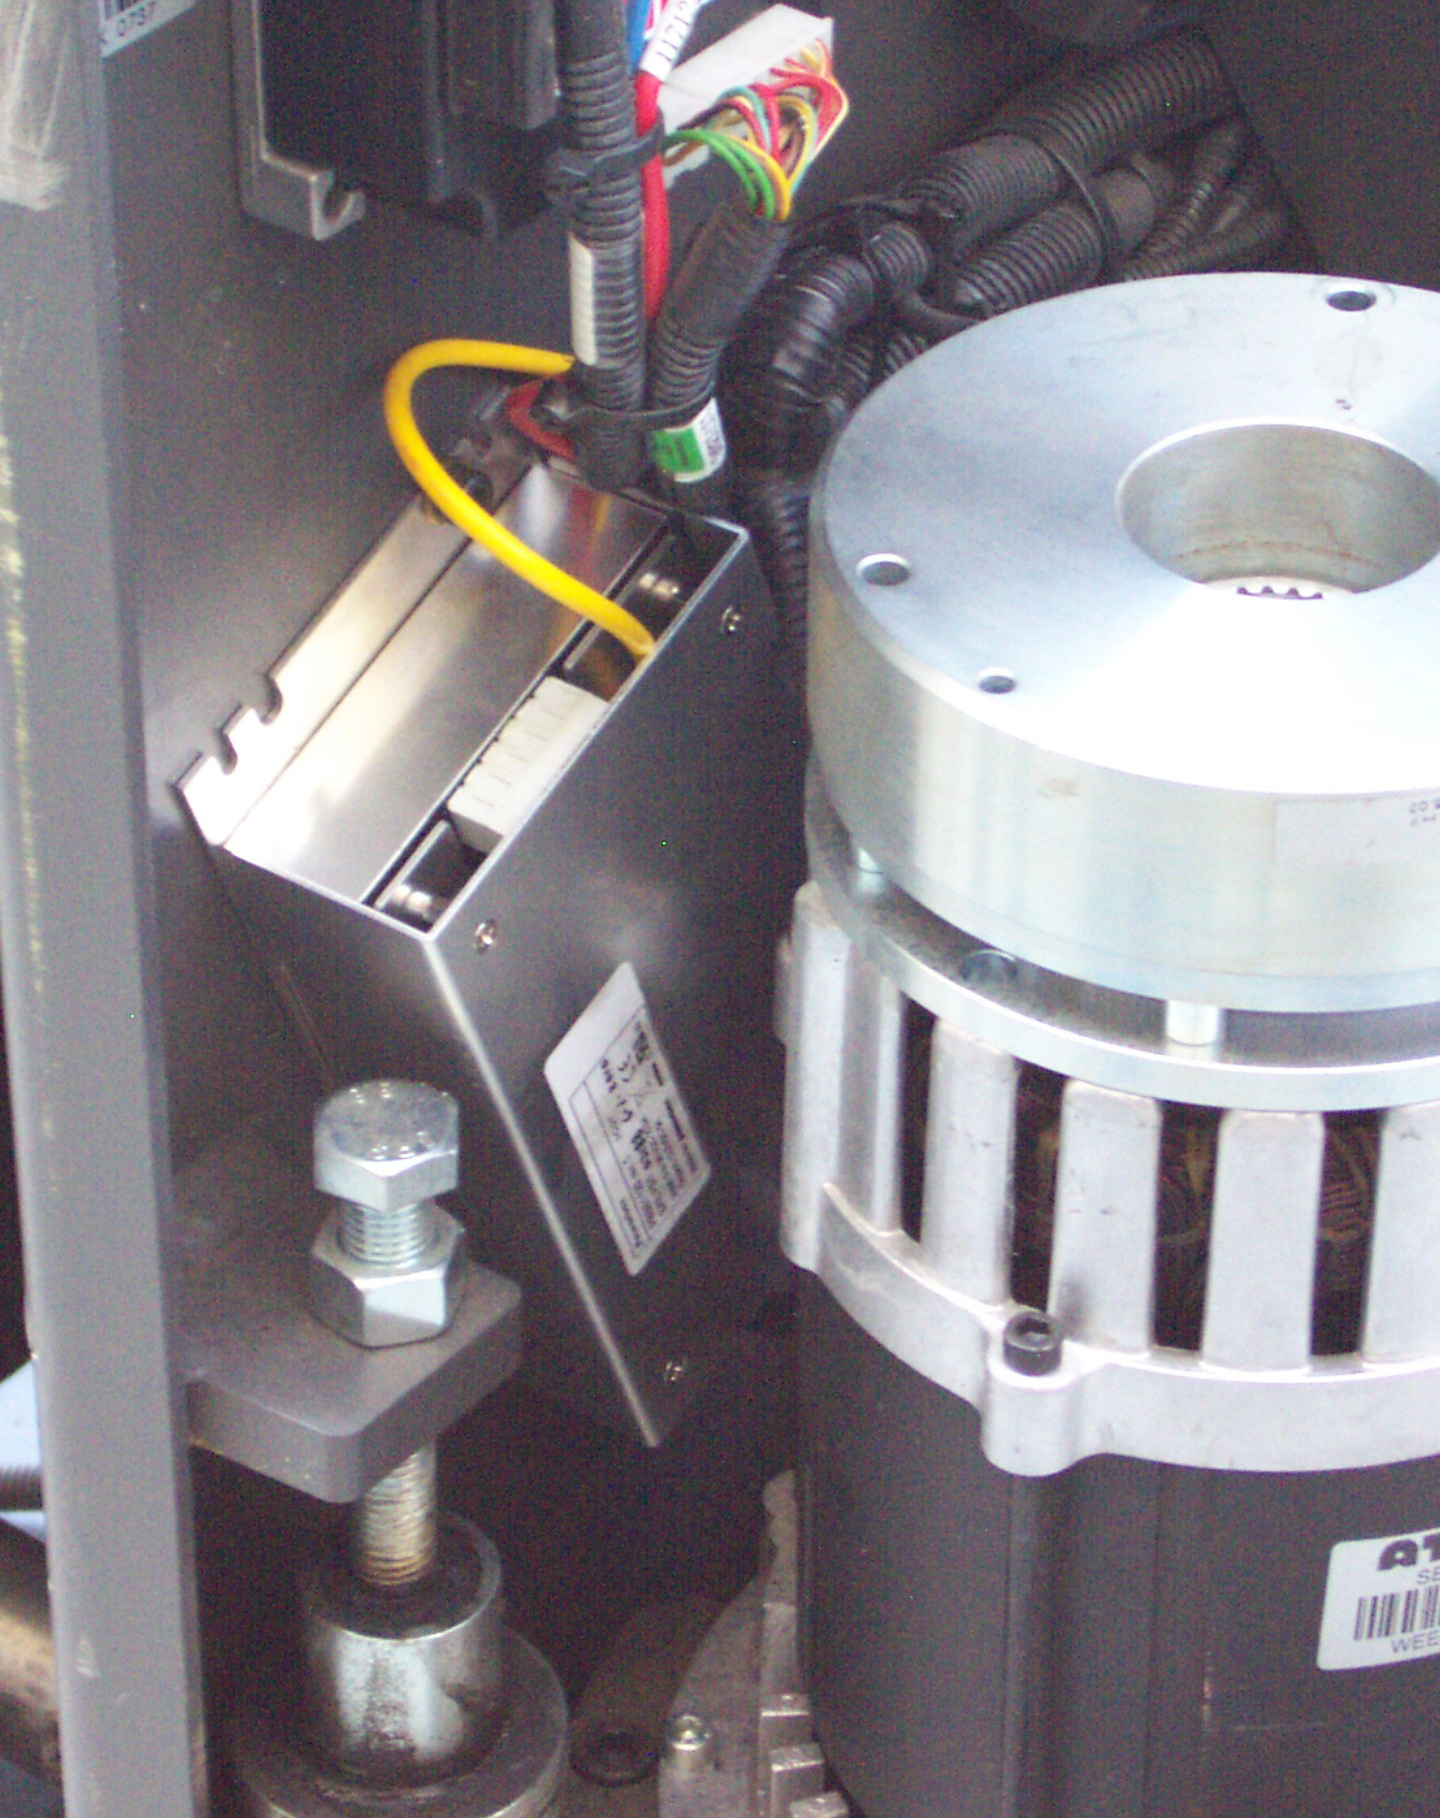
- Place the power supply in a place out of the way, such
as under the dashboard of a fork lift, and attach it to a secure surface
with cable ties. Alternatively the power supply could be secured by bolting
it using the mounting slots.

- Run the cable that connects the battery adapter to the power supply from the power supply to the location where the A500 VMT is to be mounted
- Connect the yellow wire to the battery adapter by attaching the connector and tightening the nut.